In addition to built-in residential proxies, X1Ticket allows you to use your own custom proxies for more control and flexibility.
Supported Format
Custom proxies must follow this format:
ip:port
Or with authentication:
ip:port:user:password
Importing Custom Proxies
To import a list of proxies:
- Click Custom Proxy from the top menu
- Click Load Proxy
- Select your proxy list file
The file must be a text (.txt) file with one proxy per line.
Example:
127.0.0.1:8080
192.168.1.1:8000:user:pass
Using Custom Proxies
To use custom proxies for a specific event:
- Go to Events Manager
- Add or edit an event
- Enable the “Use Custom Proxy” checkbox
- Save the event
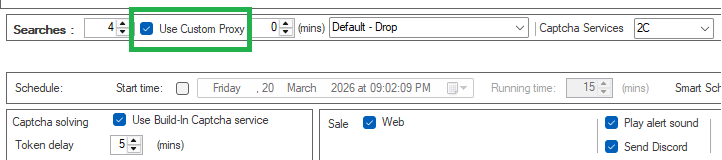
X1Ticket will then use your imported proxy list for that event.
Notes
- Custom proxies are optional
- If no custom proxy is enabled, X1Ticket will use the built-in residential proxy by default
- Make sure your proxy list is valid and active before starting an event
Recommendations
- Use high-quality proxies for better performance
- Avoid overloading a single proxy with too many requests
- Test your proxies before using them in live events


