Notes
- Accounts are required for:
- Auto Buy
- Waiting room (carted) tickets
- Accounts are not required for:
- Manual purchase of release/drop tickets
X1Ticket allows you to import and manage multiple accounts for use with auto-buy and waiting room events.
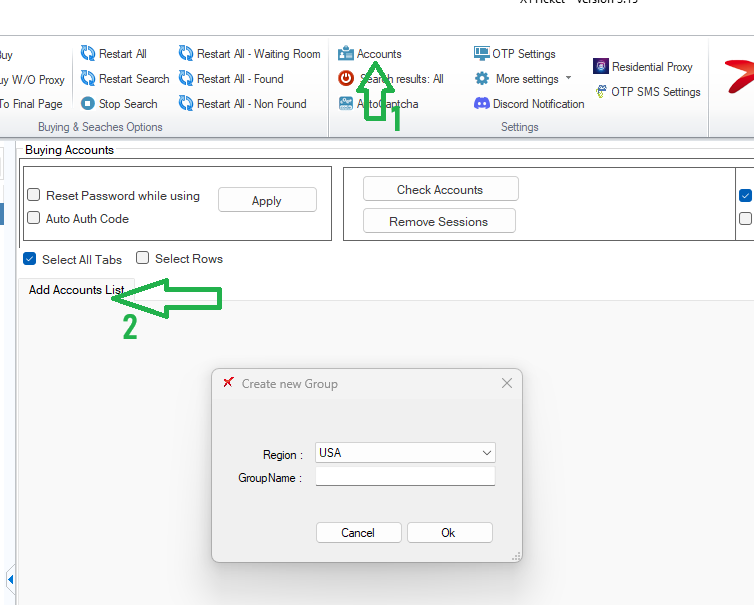
Adding a New Account Group
- Click Accounts from the top menu.
- Click Add Accounts List.
- Enter a Group Name, then click OK.
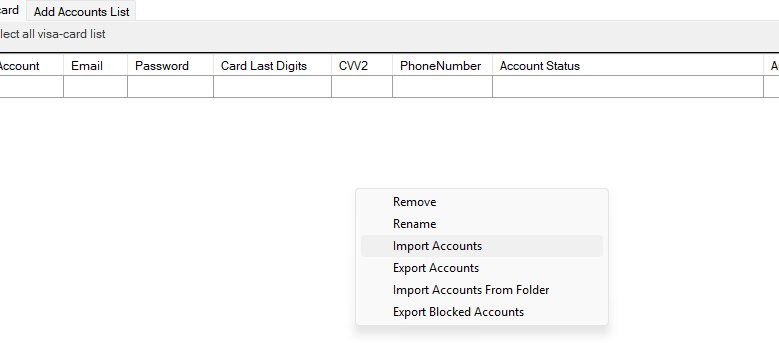
Adding Accounts
Once your group is created, you can add accounts in two ways:
Option 1: Manual Entry
- Enter account details directly into the table.
Option 2: Import from File
- Right-click inside the accounts table
- Select Import Accounts
- Choose your text file
File Format (Required)
The import file must be a comma-separated (.txt) file with the following format:
index,email,password,card_last_digits,cvv2
Example (Minimum Configuration):
1,user@gmail.com,password,4562,105
2,another@gmail.com,pass,7985,302
Advanced Configuration (Optional)
You can also assign a proxy per account:
1,user@gmail.com,password,4562,105,,127.0.0.1:8888:user:pwd
This ensures X1Ticket uses that specific proxy when operating with the account.
For full field support and correct order, see Full Account Fields.
Final Step (Important)
After importing accounts:
- Click Save
- Close and reopen the Accounts page
- Click Check Accounts
This will log into your accounts and store session cookies.
⚠️ Important:
This step is mandatory if you plan to use Auto Buy or participate in waiting room events.
Notes
- Accounts are required for:
- Auto Buy
- Waiting room (carted) tickets
- Accounts are not required for:
- Manual purchase of release/drop tickets


